How to Take a Screenshot on Windows 11: Easy Methods

Whether you’re creating a tutorial, saving a receipt, or capturing a funny moment in a chat, knowing how to take a screenshot on Windows 11 is an essential skill. The latest version of Windows has streamlined the screen-capturing process, offering multiple tools and shortcuts to fit any situation.
This comprehensive guide will walk you through all the best methods, from simple keyboard shortcuts to the powerful, built-in Snipping Tool. We’ll cover everything you need to know to become a screenshot pro.
Method 1: The Snipping Tool (The Best All-Rounder)
The Snipping Tool is Windows 11’s primary, most versatile utility for taking screenshots. It combines the features of the old Snipping Tool and Snip & Sketch into one powerful application.
Best for: Flexibility, editing, and capturing specific parts of your screen.
How to Use the Snipping Tool:

- Open the Tool: Click the Start button, type “Snipping Tool”, and select the app from the results.
- Choose a Snipping Mode: In the Snipping Tool window, you’ll see several capture modes:
- Rectangle Mode: Drag your cursor to draw a rectangle around the area you want to capture.
- Window Mode: Click on a specific application window (e.g., your browser or a folder) to capture just that window.
- Full-screen Mode: Instantly captures your entire screen.
- Free-form Mode: Draw any shape you like to create a custom-shaped screenshot.
- Initiate the Capture: Click the “+ New” button. Your screen will dim, and you can make your selection based on the mode you chose.
- Edit and Save: Once captured, the screenshot will open in the Snipping Tool editor. Here you can crop, use a pen or highlighter, and then save the image by clicking the Save icon (floppy disk).
Pro Tip: You can set a delay (3, 5, or 10 seconds) in the Snipping Tool, which is perfect for capturing menus or pop-ups that disappear when you click away.
Method 2: The Quick Shortcut (Windows + Shift + S)
This is the fastest way to access the Snipping Tool’s capture options without opening the full application first.
Best for: Speed and capturing a quick snip to paste elsewhere.
Steps:
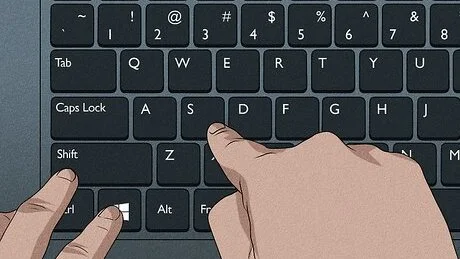
- Press Windows key + Shift + S simultaneously.
- Your screen will dim, and the Snipping Tool’s capture bar will appear at the top.
- Select your desired mode (Rectangle, Free-form, Window, or Full-screen).
- Capture your screen.

The screenshot is automatically copied to your clipboard. You can paste it directly into an email, document, or image editor (like Paint) using Ctrl + V. You’ll also get a notification; clicking it will open the image in the Snipping Tool for editing and saving.
Method 3: The Full-Screen Save (Windows + PrtScn)
This is the go-to method if you need to quickly save a full-screen image directly as a file.
Best for: Instantly saving a record of your entire screen.
How it Works:
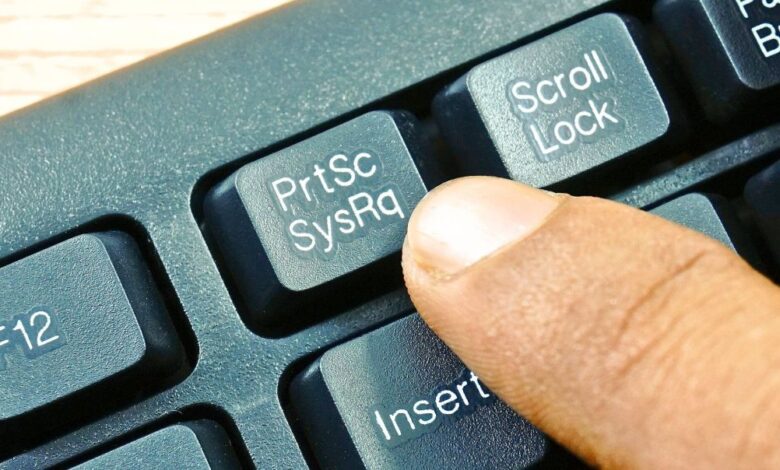
- Press the Windows key + PrtScn (Print Screen) key on your keyboard.
- Your screen will briefly dim to confirm the screenshot was taken.
- The image is automatically saved to your Pictures > Screenshots folder.
You don’t need to paste or save it manually, making this method incredibly efficient.
Method 4: The Classic Print Screen (PrtScn Key)
The old-school Print Screen key still works, but it’s important to understand what it does.
Best for: Capturing the entire screen to your clipboard for immediate pasting.
How it Works:
- Press the PrtScn key.
- This copies an image of your entire screen (or screens, if you have multiple monitors) to your clipboard.
- It does not save a file automatically. You must open an application like Paint, Microsoft Word, or an email and paste the image using Ctrl + V.
Bonus: Capture Just the Active Window (Alt + PrtScn)
To avoid capturing your entire desktop, you can capture only the window you are currently working in.
- Click on the application window you want to capture to make it active.
- Press Alt + PrtScn.
- This copies an image of only that active window to your clipboard. Paste it where you need it with Ctrl + V.
Method 5: Xbox Game Bar for Apps and Games
While designed for gamers, the Xbox Game Bar is a surprisingly handy tool for capturing screenshots (and videos) in any application.
Best for: Capturing screenshots or recordings within games and other apps.
Steps:
- Press Windows key + G to open the Xbox Game Bar overlay.
- In the “Capture” widget (top-left by default), click the camera icon.
- The screenshot is automatically saved. You can find your captures by clicking “See my captures” in the widget or by navigating to the Videos > Captures folder on your PC.
Which Screenshot Method Should You Use? A Quick Guide
| Method | Best For | Result |
| Snipping Tool | Precise selections, editing, and annotations. | Opens in editor, requires manual save. |
| Windows + Shift + S | Quickly capturing a region to paste elsewhere. | Copied to clipboard. |
| Windows + PrtScn | Instantly saving a full-screen image as a file. | Automatically saved to Screenshots folder. |
| Alt + PrtScn | Capturing a single application window. | Copied to clipboard. |
| Xbox Game Bar | Taking screenshots within games or apps. | Automatically saved to Captures folder. |
Practical Tip: Make PrtScn Open the Snipping Tool
You can make the classic PrtScn key even more powerful by remapping it to open the modern Snipping Tool interface.
- Go to Settings > Accessibility > Keyboard.
- Find the option “Use the Print screen button to open screen snipping”.
- Toggle it On.
Now, whenever you press PrtScn, it will act as if you pressed Windows + Shift + S, giving you instant access to the best capture tools.
Conclusion
Mastering how to take a screenshot on Windows 11 is simple once you know the options available. For most daily tasks, the Snipping Tool and its shortcut Windows + Shift + S offer the perfect balance of power and convenience. For a quick, no-fuss file, Windows + PrtScn is your best friend.
By choosing the right tool for the job, you can capture, edit, and share what’s on your screen more efficiently than ever before. Bookmark this guide and start taking better screenshots today


thanks