Breathe New Life into Your Old PC: A Complete Guide to Installing Windows 10 Lite
Is your trusty computer feeling slow and sluggish under the weight of a standard Windows 10 installation? Do you find yourself waiting for programs to open or for the system to respond? Before you consider an expensive upgrade, there’s a powerful solution designed specifically for older or less powerful hardware: Windows 10 Lite.
Windows 10 Lite is a modified, stripped-down version of the original operating system. It removes non-essential features and background processes, resulting in a significantly faster and more responsive experience. It’s the perfect way to revitalize an old laptop or desktop, transforming it into a speedy, efficient machine.
This comprehensive guide will walk you through every step of the process, from downloading the necessary files to completing the installation. Let’s get started!
What You’ll Need
Before we begin, make sure you have the following ready:
- A USB Flash Drive: A minimum of 8 GB is required.
- The Windows 10 Lite ISO file: We’ll show you where to get this.
- The Rufus utility: A free, lightweight tool for creating bootable USB drives.
- An internet connection: For downloading the files.
Step-by-Step Installation Guide
Follow these four parts carefully to ensure a smooth installation.
Part 1: Downloading the Necessary Files
First, we need to gather our tools.
1. Download Windows 10 Lite
The operating system file (in .ISO format) is the most important component. You can find a reliable download link on our official website.
- Click Here to Visit Our Download Page:
- Once on the page, scroll down to the download section.
- Click the download link for Windows 10 Lite, agree to any terms, and the .ISO file will begin downloading.
2. Download Rufus
Rufus is the best utility for turning our ISO file into a bootable USB drive.
- You can download Rufus from its official website or use the link on our page.
- Click Here to Download Rufus:
- Download the standard, portable version. It’s a small file and doesn’t require installation.
Part 2: Creating a Bootable USB Drive
Now we will use Rufus to prepare our flash drive.
Warning: This step will completely erase all data on your USB flash drive. Make sure you have backed up any important files from the drive before proceeding.
- Plug your USB flash drive into your computer.
- Open the Rufus application you just downloaded.
- Rufus should automatically detect your USB drive under the Device section. If you have multiple drives connected, ensure you select the correct one from the dropdown menu.
- In the Boot selection section, click the SELECT button.
- Navigate to where you saved the Windows 10 Lite ISO file and select it.
- Leave the Partition scheme and Target system options on their default settings. Rufus will automatically choose the best configuration for your system.
- (Optional) You can rename your USB drive in the Volume label field. We suggest naming it “Windows 10 Lite” for easy identification.
- Click the START button.
- A customization window will appear. Since this is a modified OS, you can pre-set a username here. You can leave it as the default or change it now. Click OK.
- A final warning will appear, confirming that all data on the drive will be destroyed. Click OK to begin the process.
Rufus will now start burning the ISO file to the flash drive. This process can take several minutes, so be patient. Once the progress bar is full and says READY, the process is complete. You can close Rufus.
Part 3: Booting from the USB Drive
It’s time to restart your computer and tell it to start from the USB drive instead of your hard drive.
- Keep the USB drive plugged in and restart your computer.
- As soon as the computer begins to boot up (when you see the manufacturer’s logo, like Dell, HP, etc.), you need to repeatedly press the Boot Menu key.
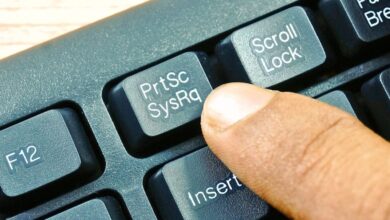
- This key varies by manufacturer but is commonly F12, F10, F2, or Delete The Ultimate Guide: How to Find Your PC’s Boot Menu Key (Dell, HP, Lenovo, & More)
- A menu will appear. Use your keyboard’s arrow keys to navigate and select your USB flash drive from the list. It may be listed by its name (e.g., “Windows 10 Lite”) or as a “USB Device.”
- Press Enter.
If successful, you will see the Windows installation screen, which means you’re on the right track!
Part 4: The Windows Installation and Disk Management
This is the most critical part of the process, where we prepare the hard drive for its new operating system.
Note: We are performing a Clean Install. This ensures the best performance by removing all old files, programs, and the previous operating system.
- When you reach the “Where do you want to install Windows?” screen, you will see a list of existing partitions on your hard drive.
- Delete Existing Partitions: Our first goal is to create a clean slate. Select each partition in the list, one by one, and click Delete. Confirm by clicking OK each time. Continue until you are left with only one single item labeled Unallocated Space.
- Create a New Partition: Now, with the “Unallocated Space” selected, click New.
- A size box will appear. Here, you must enter the desired size for your Windows partition in megabytes (MB). For example, if you want a 100 GB partition, you would type 100000. Click Apply.Tip: Windows will automatically create one or two small additional partitions for system files. This is normal and necessary.
- Select the Primary Partition: From the new list of partitions, select the largest one, which will be marked as Type: Primary. This is where Windows will be installed.
- With the primary partition selected, click Next.
And that’s it! Windows will now begin copying files and installing the operating system. Your computer will restart automatically a few times during this process. Do not press any keys or remove the USB drive until you are greeted with the final setup screen.
Part 5: Finalizing the Setup
Congratulations! The hard part is over. All that’s left is to configure your user settings.
- Enter your desired username and click Next.
- Set a password, confirm it, and click Next.
- Set up your security questions as a backup in case you forget your password.
- Finally, click Accept on the privacy settings screen.
Welcome to Your New, Faster PC!
You’ve done it! You will immediately notice a significant improvement in your computer’s boot speed and overall responsiveness. Your old machine now has a new lease on life with a fast, lightweight operating system.
We hope this guide was clear and helpful. If you encountered any issues or have any questions, feel free to leave a comment below, and we’ll do our best to help

